Fruity Ice Cream Butter Cake Recipe : One of my all-time favorite dessert recipes is this one. It tastes fantastic and is quite simple to make. To make your own version, you can add other components. You might use your preferred fruit in its place, for instance, if you have diverse tastes in fruit. To make the recipe easy to follow, I’ve included step-by-step directions with videos and pictures.
Fruity Ice Cream Butter Cake Recipe

Ingredients
- 1 (200-gram) packet trifle sponge
- 2 large oranges or 3 satsumas
- 1 (410-gram) tin pineapples
- 100g raspberry jam or jelly
- 2 large bananas
- 1 (1-litre) tub creamy ice cream
- 1 (100-gram) bar chocolate
- 2 (32-gram) bars flake chocolate
- 250 milliliters double or whipping cream

Instruction
Stage 1: Prepare the Bowl
Put cling film, also known as salan wrap, around a bowl’s edges. Make sure to include space at the top so that you can wrap it all the way around the top of the cake after the contents have been added.

Stage 2: Build the Cake
Slice the sponge in half lengthwise and again in half width. This will provide you with the appropriate size to fit around the bowl’s perimeter.
Don’t forget to save some for the cake’s top.
Onto the pieces of sponge, spread the jam.
Arrange the pieces in the bowl starting from the bottom and working your way around the sides, jam side up.
Place a whole pineapple slice in the center of the bottom and then surround it with smaller pineapple pieces.
Incorporate ice cream.
Layer the pineapples again, slicing in some orange segments and bananas.
Cram in additional ice cream.
You should keep doing this till you get to the top.
Place the remaining sponge on top of the cake to finish.
Press down hard to make it all compact.
Pull over the cling film to completely cover the top.
Put the bowl in the freezer for at least three hours.
Stage 3: From Freezer to the Table
Remove from the freezer at least two hours prior to consumption.
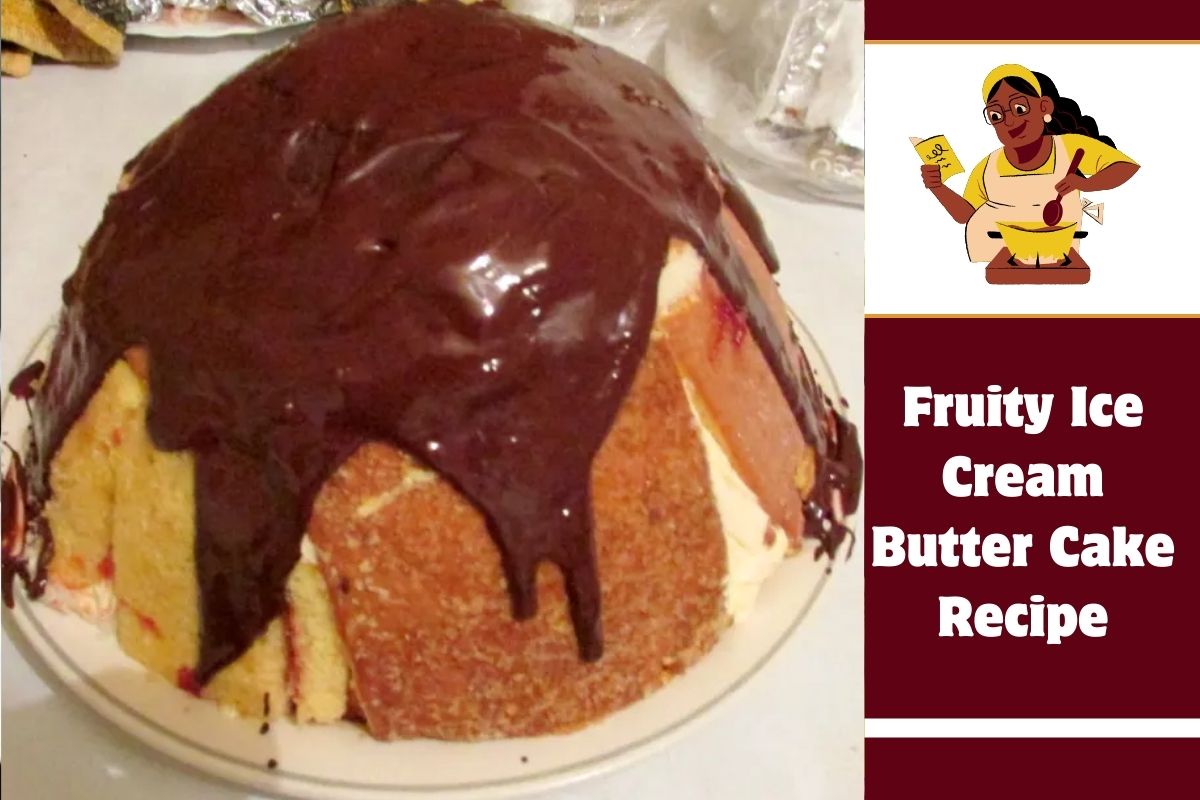
After taking the cake out of the bowl, place it on a sizable plate.
This is simplified by the use of cling film.
After an hour in the refrigerator, spend the final hour outside on the counter.
Stage 4: Prepare to Serve
Beat the cream and store it in the refrigerator.
Place a bowl with broken up chocolate bar over a pan of boiling water. Pour the chocolate into a half-cup of hot water and stir until the chocolate melts.
Pour it on top of the cake once it has melted fully.