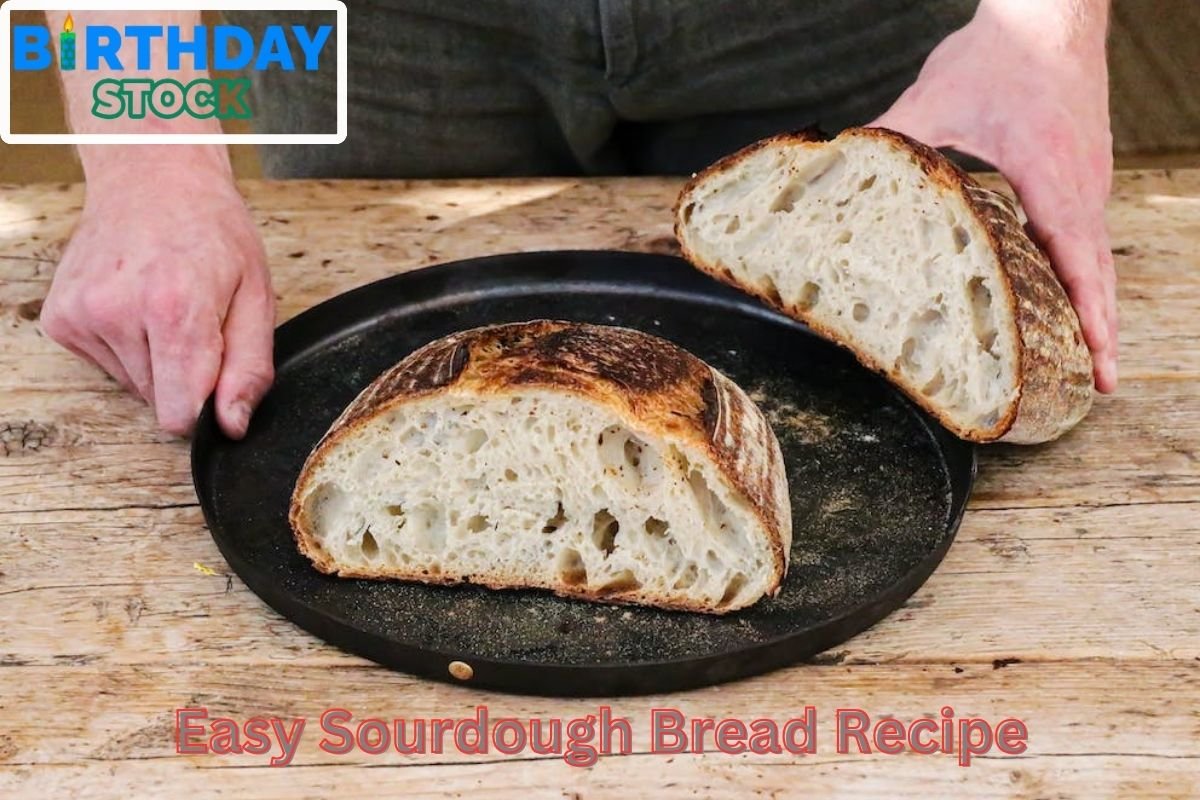
Easy Sourdough Bread Recipe : Want to learn how to make sourdough bread at home the easy way? Our beginners sourdough bread tutorial will guide you through the process, step-by-step. Whether you want to bake in the morning or in the evening, you’ll only need about 10 minutes of hands-on time to get this sourdough recipe ready for the oven!
Are you prepared to learn how to create basic sourdough bread from scratch without any fuss or extras like kneading? With our simple step-by-step instructions and instructional video, you can!

You can create sourdough bread without a bread machine or stand mixer by following this instruction. There is no need to knead; all you have to do is let the sourdough starter and time do the work!
You’ll soon be able to enjoy making your own sourdough recipes, such sourdough pizza crust, sourdough bagels and pretzels, and much more, after you feel comfortable with this recipe!
Easy Sourdough Bread Recipe


MY STORY OF SOURDOUGH
- I began to have a strong interest in baking bread the traditional manner. the method used to make bread by humans for thousands of years—without the use of commercial yeast.
- I discovered that I could make nutritious bread without the use of active or quick yeast by utilizing a sourdough starter and a few basic ingredients—flour, salt, and water.
- That’s when I created my sourdough starter, Hound Dog, and I haven’t baked bread with commercial yeast since.
- Baking bread with sourdough is a journey. To gain a feel for the dough and other elements that will impact the outcome, plan to bake a couple loaves.
- The good news is that once you get going, you won’t want to stop! Possessing this expertise is really fulfilling, and I’m sure that with our advice, you’ll be creating a variety of sourdough treats!
SOURDOUGH BREAD: WHAT IS IT?
- Slow-fermented sourdough bread is organically leavened by a sourdough starter.
- To make the bread rise, a live fermented culture, sometimes called a sourdough starter, is used in place of commercial yeast.
- The sourdough starter breaks down the gluten in the dough, making the bread easier for the body to digest. It tastes better than any bread you could buy from the store or a bakery, on top of being healthy!

STARTER FOR SOURDOUGH
- You will need a sourdough starter before you bake your first loaf of sourdough bread.
- In a jar, combine flour and water to make a sourdough starter. The flour serves as a food source for wild yeast and bacteria from the surrounding area, which increases the quantity of these organisms in the combination.
- The starter ultimately grows stronger and can be used to make sourdough bread with consistent feedings.
- Depending on the kitchen’s temperature, creating a fresh sourdough starter from scratch can take seven to fourteen days.
Also See
Directions for Feeding a Sourdough Starter For this Recipe:
- I prefer to feed it with a tiny amount of sourdough starter mixed with flour and water, let it rise gradually over a few hours.
- Before going to bed, feed the starter, and in the morning, combine the dough to make freshly baked bread that evening. Alternatively, mix the dough before going to bed, feed it in the morning, and bake it the next day. This dish is really simple to work into your schedule!
- Regardless of the time you select, combine 10 grams of unfed starter, 25 grams of flour, and 25 grams of water in a clean jar, cover it loosely, and leave it to rise at room temperature for 12 hours before making the dough.
QUICK SOURDOUGH BREAD: PART-BY-PART INSTRUCTIONS
- Let’s examine the fundamental procedures for making a basic sourdough loaf of bread before getting into the specifics.
1. Feed your sourdough starter, then wait for it to double in size.
2. After combining the dough, let it rest at room temperature for one hour.
3. Do two sets of folds and stretches separated by thirty minutes.
4. On your kitchen counter, cover the bowl and let the dough ferment for seven to ten hours.
5. After shaping the dough, give it a one to two hour rise, After scoring, bake.
Step First: feed the starter with sourdough.
- A clean jar should be added to about 12 hours before you plan to mix the dough.
- ten grams of uncooked beginning
- 25 grammes of water
- 25 grams of flour
Step Second: combine the dough.
- After the starter has doubled in size, pour 350 grams of water and the starter into a big basin.
- To thoroughly spread the starter in the water, stir the two together using a stiff spatula.
- Next, fill the basin with 500 grams of bread flour and 10 grams of sea salt.
- Work the mixture with the spatula or your hands until a shaggy lump develops.
- Ensure that any dry particles adhered to the bowl’s sides are incorporated into the dough.
Step Third: Fold and stretch the dough
- After an hour, give the dough two sets of stretches and folds, separated by thirty minutes.
- This procedure will help the dough grow its gluten and give it more strength.
Step Four: First Rise/Bull Fermentation
- Cover the bowl and let the dough on your kitchen counter to ferment for seven to ten hours after the second round of stretch and folds.
Step Five : Form and Subsequence
- Transfer the dough onto a surface that has been lightly floured.
- How to form a sourdough boule in the round
- Pulling the dough’s four sides up and into its center will help you shape it into a ball.
Step Six : Preheat the oven using an internal Dutch oven
- Before the dough is ready to bake, preheat your oven to 450°F (232°C) and place the empty dutch oven inside for around 30 minutes.
- How is sourdough bread baked?
- I bake sourdough bread in a 5-quart Dutch oven.
Step Seven: Bake and Score
- When the dough is ready, cut a 2-3 inch slit across the top of the dough with a sharp razor blade or bread lame.
- By scoring the dough, you can prevent it from bursting at its weakest spot and instead allow it to expand and rise upward.

STORING SUCCULENT BREAD
- Alternatively, you can place the bread, cut-side down, on a chopping board and cover it with a cake stand top.
- The bread will get hard if it is refrigerated.
- Whole loaves or single slices can be frozen for up to three months if they are well wrapped in plastic wrap and placed in a freezer-safe container.
- Because it thaws so nicely, I like to keep my bread in the freezer in individual slices.
- It’s so simple to indulge in foods like avocado toast whenever I feel a yearning when I have these precut slices!