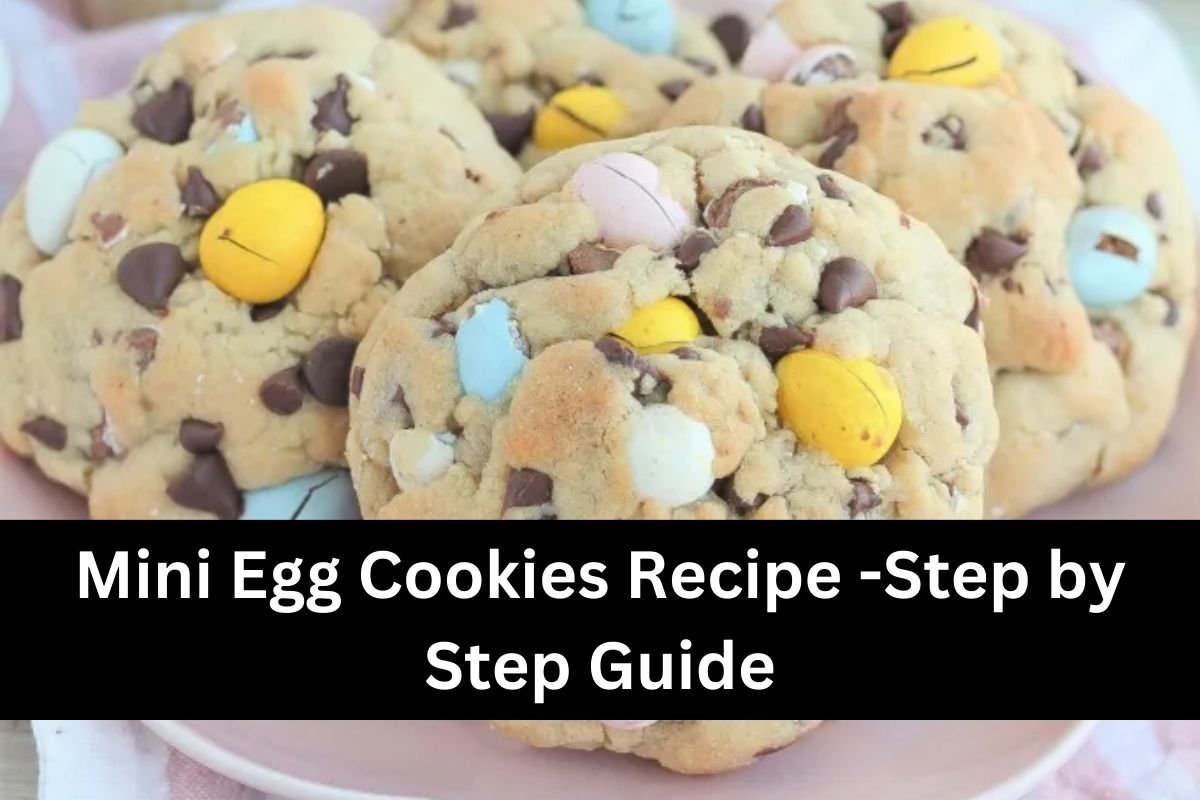
Mini Egg Cookies Recipe -Step by Step Guide:-We’re back with a brand-new cookie that tastes great: Cadbury Mini Egg Cookies with Browned Butter. They go so well together in this delicious cookie that it makes your mouth water.
What a cute treat these would be for Easter or an Easter egg hunt with the family.
Mini Egg Cookies Recipe -Step by Step Guide

Ingredients :
- 1 cup unsalted butter – divided (1/2 cup, or 1 stick, will be used for the browned butter), cold and cubed
- 1 cup brown sugar, packed
- 1/4 cup granulated sugar
- 2 large eggs, cold
- 1 teaspoon pure vanilla
- 3 1/4 cups all purpose flour
- 1 teaspoon cornstarch
- 1 teaspoon baking soda
- 1 teaspoon salt
- 1/2 cup mini chocolate chips
- 1 cup semi sweet chocolate chips
- 1 cup Cadbury mini eggs , Any small candy with a hard chocolate shell will do (M&M’s, Lindt Eggs, etc).
- 1/2 cup crushed Cadbury Mini Eggs
Instructions :
In advance, make the brown butter. Here’s how: Take 1/2 cup of butter (1 stick) and place it into a small saucepan. Over medium heat, melt the butter, about 2 minutes.

It will begin to bubble, then it will start to foam. When the foam appears, stay close and gently stir the butter until it starts to turn a dark amber color and smell slightly nutty.

Immediately remove it from the heat and add the browned butter to a dish to cool back into a solid (I just pop mine into the freezer for 15 minutes or so). Make sure to scrape up any dark bits from the bottom – that’s where all the flavor comes from!
Prep two large aluminum cookie sheets with parchment paper and set aside.
Preheat oven to 410 degrees (yep, that’s right!)
In a stand mixer fitted with a paddle attachment, whip up the butter for 1 minute until it’s light and fluffy, then add in the sugars to cream together with the butter for 3 minutes on high speed.
Scrape down the sides of the bowl and then add in the vanilla and eggs. Mix again until combined.
Add in the flour, cornstarch, baking soda, and salt and slowly mix together on the very lowest mixer speed until just combined (don’t overmix!)
Reserve 1/8 cup of mini chocolate chips, chocolate chips, and a handful of mini eggs on the side, then mix in the rest on the lowest speed. Split the dough into 8 balls (baseball-sized) and place 4 on each cookie sheet. Hand-press on the chocolate chips and Cadbury eggs.
Bake for 7-9 minutes. They should be slightly golden on the outside, slightly mounded in the middle, and thick/tall, and gooey in the center. Let them cool on the pan for 1 minute, then carefully transfer the cookies to a cooling rack to finish cooling. Enjoy!
TIPS FOR SUCCESS :
Look through my COOKIE recipe area on Baking with Blondie. There are a lot of cookies for you to bake. I’m sure you’ll find a new favorite.
Here are some tips to make sure these cookies always turn out great (which shouldn’t be hard, since they’re pretty strong!)
In fact, 410 degrees on the regular (not convection bake) setting of the oven is great. It seems high, but trust me, it’s necessary to get the right toasted outside and gooey inside structure.
You don’t need to mix your dry items together ahead of time. Throw them in and mix them up.
Both the eggs and the butter need to be cold.
It’s important to fully mix the butter and sugar before adding the eggs and vanilla.
Put the toppings down below the line of cookie dough. They won’t burn in the oven that way.
Save some of the extras, like chocolate chips, Cadbury eggs, etc., to press on the outside of the cookie to make it look better. However, they will taste the same no matter what.
My is about the size of a baseball. They should get a little flatter. If they get really flat, the baking soda isn’t new enough. I’ve also seen that they get a little flatter as they cool.
If you find that the first batch doesn’t smooth enough, press down a little on the next one that’s going into the oven.
If you want to make these cookies smaller, bake them for a little less time and watch them carefully while they’re cooking.
They should still be gooey in the middle and crispy on the outside.
The cookies don’t need to be chilled! The best part is that!